
Here’s a step-by-step tutorial on how to replace the SATA HDD/SSD connector cable in Acer Aspire V17 Nitro using compatible part numbers like:
🔧 How to Replace the HDD/SSD SATA Cable in Acer Aspire V17 Nitro (VN7-791G VN7-792G)
⚠️ Disclaimer
This process involves partial disassembly of your laptop. Doing so may void your warranty. Proceed only if you’re comfortable working with electronics and static-sensitive components.
🧰 Tools and Materials Needed
Phillips screwdriver (size PH0 or PH1)
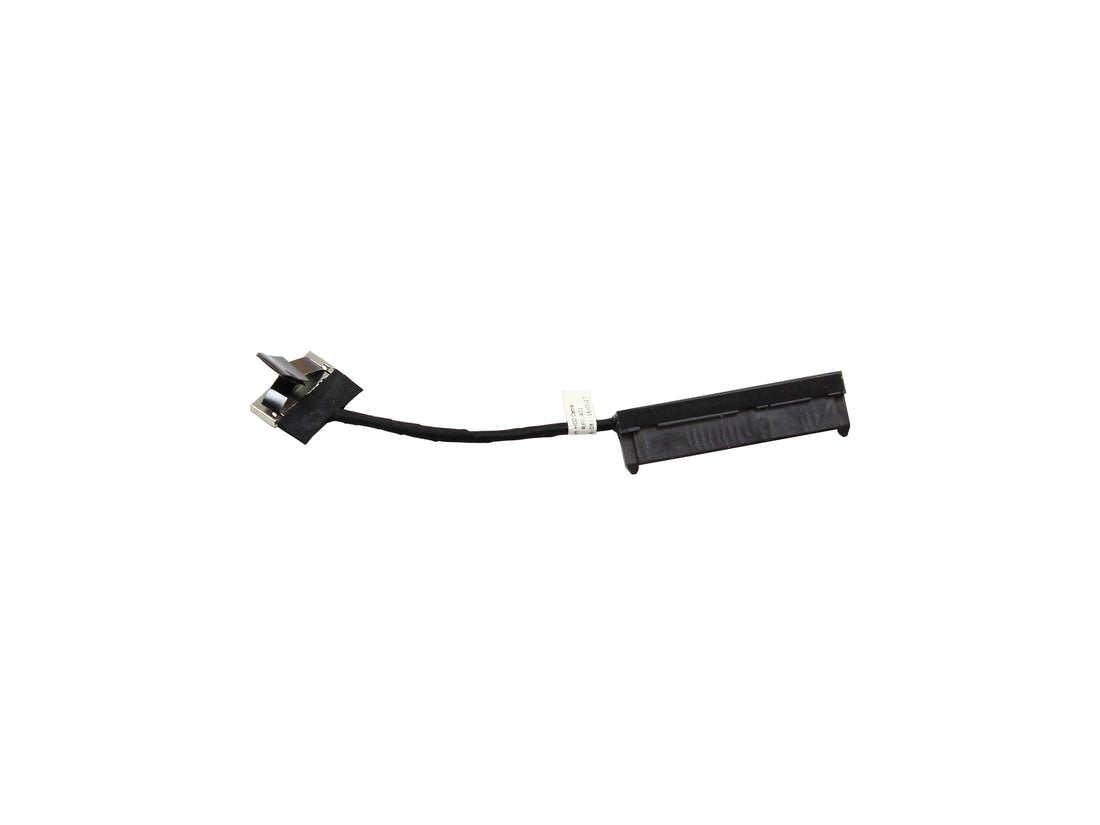
Replacement SATA HDD/SSD cable: 50.MQSN1.003 450.02G06.0011
Anti-static wrist strap (recommended)
🔌 1. Power Off and Unplug
Shut down the laptop completely.
Disconnect the power adapter and all connected devices.
Press and hold the power button for a few seconds to discharge any remaining power.
📦 2. Remove the Bottom Cover
Place the laptop upside down on a soft surface.
Remove all screws securing the bottom panel.
Carefully lift off the bottom cover.
💽 3. Disconnect and Remove the Old SATA Cable
Locate the HDD/SSD drive bay area.
If a drive is still connected, carefully remove it by loosening the screws on the caddy and sliding it out.
Identify the SATA ribbon cable that runs from the drive to the motherboard.
Gently flip up the locking tab of the ZIF (Zero Insertion Force) connector on the motherboard and pull out the ribbon cable.
Do the same for the end connected to the drive caddy.

🔁 4. Install the New SATA Cable
Insert the replacement cable into the motherboard ZIF (Zero Insertion Force) connector.
Push it fully inside, then lock the connector by pressing down the latch.
Connect the other end to the HDD/SSD caddy or adapter board.
If reinstalling a drive, slide the HDD/SSD back into the bay and secure it with screws.
🧩 5. Reassemble the Laptop
Place the bottom cover back onto the chassis.
Secure it with all screws.
Reconnect any removed components.
⚙️ 6. Test the System
Plug in the charger and power on the laptop.
Enter BIOS (usually F2 at startup) and check if the HDD/SSD is detected.
If detected, boot into Windows and confirm that the drive is working properly.
🎉 Done!
You’ve successfully replaced the HDD/SSD SATA cable in your Acer Aspire V17 Nitro. If your drive wasn’t being detected before, this replacement should restore functionality.