
Here’s a step-by-step tutorial on how to replace the HDD/SSD SATA cable and mounting bracket set in compatible ASUS VivoBook 15 models like:
🔧 How to Replace the HDD/SSD Cable and Bracket in ASUS VivoBook 15 A509 F509 K509 M509 P1501 P1503 P1510 R424 R509 R521 R524 S509 X509
⚠️ Disclaimer
This repair requires opening your laptop and handling delicate connectors. Proceed carefully and avoid forcing the SATA cable or damaging the connectors on the motherboard or drive.
🧰 Tools and Materials Needed
Phillips screwdriver (PH0 or PH1)
Plastic spudger or pry tool (optional)
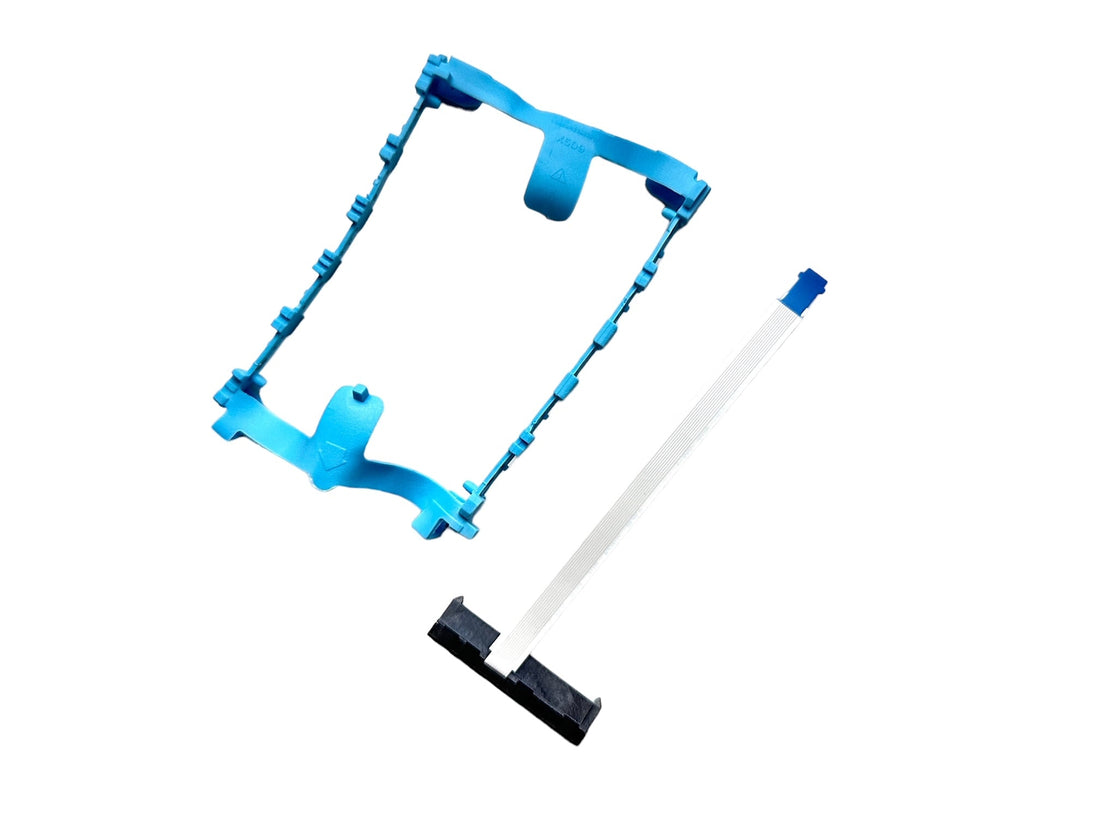
Replacement HDD/SSD cable and bracket set.
Anti-static wrist strap (recommended)
🔌 1. Power Off and Unplug
Shut down the laptop completely.
Disconnect the charger and all external devices.
Hold the power button for 5–10 seconds to discharge remaining power.
📦 2. Remove the Bottom Cover
Place the laptop upside down on a soft surface.
Remove all screws securing the bottom panel.
Carefully pry and lift off the bottom cover using a plastic tool if needed.
🔋 3. Disconnect the Battery
Locate the internal battery connector on the motherboard.
Carefully disconnect it to prevent short circuits.
💽 4. Locate the HDD/SSD Bay
The hard drive/SSD compartment is usually located along one edge of the chassis.
If an old drive and cable are installed, proceed to remove them.
🧱 5. Remove the Old HDD/SSD and Cable Assembly
Unscrew the mounting bracket securing the old drive.
Gently lift and remove the drive assembly.
Disconnect the SATA cable from both the drive and the motherboard.
If the bracket is attached to the drive with screws, remove those as well.

🔁 6. Install the New Cable and Bracket Set
Attach the new HDD/SSD cable to the replacement bracket.
Mount the drive (HDD or 2.5" SSD) onto the bracket using the provided screws.
Connect the SATA cable to the drive’s connector securely.
Re-route the flat SATA cable carefully through the same path or guide channel as the original to avoid pinching or twisting.
Connect the other end of the cable to the motherboard SATA port, ensuring a firm, even connection.
🧩 7. Reassemble the Laptop
Reconnect the battery.
Reattach the bottom cover and tighten all screws.
⚙️ 8. Test the System
Plug in the charger and power on the laptop.
Enter the BIOS (press F2 during startup) to verify that the new drive is detected.
If the drive appears, proceed to install or boot your operating system normally.
🎉 Done!
You’ve successfully replaced the HDD/SSD SATA cable and mounting bracket set in your ASUS VivoBook 15. Your storage drive should now be firmly secured and properly connected for reliable performance.